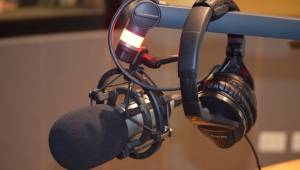
The art of recording audio is a matter of taste. One part of the process is scientific while the other is art. Your personal experience will be your best guide. If your recording sounds the way you think it should sound, you will have achieved your goal. My job is to give you the scientific knowledge for you to do the final art.
The microphone takes the acoustic energy and converts it into electrical energy which is then used in audio systems. It is built with acoustic filters that can mold sound or eliminate unwanted noise, before being converted into electrical energy. An example that can prove it with the naked eye are the wind meshes that are placed in front of the microphones and prevent the blows of breathing and the sound of the wind when used outdoors. In many microphones there is a small disc with holes in a specific order that act as a filter for acoustic waves at certain frequencies. This is called a Hermholtz filter.
One of the most difficult uses of microphones is to record an entire orchestra. If your responsibility is based on choosing and positioning all the microphones for this purpose, you will already imagine how many options there are and how many decisions you must make. Each musical instrument presents its own problems; there is no universal microphone that can be used with all instruments and get the most out of it. The microphone should be chosen for its frequency response and other characteristics such as collection patterns.
For this article we will take as an example the recording with the following instruments: lead voice, choristers, string section, piano, woodwinds, trumpets, percussion and guitars. This can be done on a multi-channel machine in which each section will be recorded one at a time and then all mixed in stereo or monophonic. Each party will present a specific problem that must be solved. First let's look at the frequency range of each.
It is necessary to clarify that the proper selection of a microphone will surely increase the recording quality. The best thing you can do for your recording is to capture the sounds as faithfully as possible before modifying them in any way. Then, with equalization and signal processors, variations can be made to taste.
The following chart is a guide to selecting the right microphones. It is not the best or the only one. Your personal experience will be your most valuable advisor.
Vocals
Voice solo recordings are very difficult. Any imperfection, no matter how small, will cause all kinds of difficulties in the recording process. The problems of the P and the T are always unpleasant (See fig.1).
The problem of the S is almost always treated with an electronic device that softens the tapping when pronouncing that letter. The distance between the vocalist and the microphone is always very important and is usually 48 to 50 centimeters. This measure can be varied if the vocalist has control over his projection (how hard or soft he speaks or sings). It should be noted that if the level is very high it is likely to cause distortion. It is recommended that the microphone has a little heat so that the final recording sounds very natural. The natural increase in level at 1-3 KHz will add presence (see fig. 2). Many of the microphones designed for voice may already have this feature built within themselves or it is possible to increase these frequencies in the mixing console.
The next type of recording will be a small choir. We will take as an example four choristers and the possible combinations to microphone them. In fig. 3 there are four singers and two microphones while in fig.4 there are four singers and four microphones. Remember a very important fact, you are not in a vacuum room, you are in a room with natural reverberation factors. Hence, you should know the place where the recording is being made because its variations will add or subtract tonal quality to the sound. In Fig. 3 it is necessary to take into account the phase considerations.
Instruments
Ropes
The recording of strings, violins, violas, cellos and double basses are usually done in groups (see fig.5). These have the same elements: they are all vibrant strings that do not radiate sound directly. Its sound travels through the air without almost moving it. What we hear is transmitted to the sound cover of the instrument by means of a bridge. The back of the lid is usually obscured by the human body. The sides of the instrument are generally opaque because of their size. High frequencies are almost always the strongest at 90-degree angles of the front panel. The lower frequencies are generated in an omnidirectional manner.
The above is important to know since the positioning and type of microphone will produce different effects. I repeat, low frequencies are almost always omnidirectional, while high frequencies are more direct. Experimentation is needed in order to develop the best sound for recording (see fig.6). The lowest note given by a violin is 196 Hz, while the highest is about 10 KHz. We now know that a microphone with a limited range will serve well. The viola can be treated like the violin but with extended low frequencies.
The cello presents a number of different problems (see fig.7). The difference is that the microphone must extend below 100 Hz, at a certain working distance. If this is not possible the mixer could do the job. Make sure the other instruments don't get in the way of the sound. A cardioid-type microphone can be a good choice, if it is microphoned as a single instrument.
The double bass is also very popular in many types of recordings. It should be microphoned up close, several centimeters from the bridge, and facing down the ropes. A cardioid-type microphone is recommended. Other ideas can be used. Put a cardioid microphone near the F-shaped hole in the high strings. Another small one can be suspended from the bridge.
Woodwinds
Woodwind instruments can be described as musical instruments that have key or finger gaps, where sound is generated from the gaps rather than the bell. Hence the sound is captured "from the source". The microphone is pointed towards the first holes of the instrument, in the front and above the musicians for a good balance of sound. If any specific sound is important to the piece of music, the position can be changed (see fig. 8)
The flute presents a special problem. The musician blows through the tip of the instrument, so the microphone should be placed in front of the musician, about 32 cm away from the instrument. Another option would be to put it in half between the mouth of the flutist and the fingers, a little below the instrument to eliminate the effect of the murmur on the part of the instrument where the mouth is placed.
In popular music, it is sometimes necessary that the presence of one instrument is noticed more than that of the others. This can be achieved by electronic means with an increase of 5 to 8 decibels, between 2500 and 3000 Hz. One should check if the desired effect is musically correct.
Metallic winds
Metallic wind instruments (trumpets, trombones, etc.), are used in many recordings due to their wide dynamic range. This is good and bad for the recording engineer. Since it is possible that this wide range could come before the level adjustment with the fader, it might be a good technique to put a pad before the microphone input to the preamplifier. Microphones with wide dynamic ranges are also a good choice.
The electret condenser microphone meets these needs. This should also have low distortion, so that it does not add to the basic distortion of the system.
The sound of trumpets and trombones comes straight from the front; the sound of the tuba is directed to the ceiling, while the French horn is directed to the floor. Although these instruments present great problems to the recording engineer, their arrangement is easy (see fig. 9). One help could be to use reflective displays and, or, positioning the wind group in a specific way to nuance the audio quality. In the electronic part, the mixing console can increase the effectiveness of these microphones by 2 to 4 decibels in the 6000 to 9000 Hz.
Percussion
When a battery is microphoned the key to doing a good job would be to get a good balance of all the drums. The drums produce a high acoustic power at the low frequencies, while the triangles, cymbals, gongs and drums radiate strongly at the high frequencies (10,000 Hz up), but with fewer powers (See fig. 10) For this situation a cardioid dynamic microphone might be the best choice. Several microphones placed at strategic points will capture the right sound. The balance of these microphones and their problems can be solved with the positioning and their adjustment in the mixing console.
Piano
Pianos are modified string instruments. They have strings that are struck with small hammers and vibrate in a sound box. There are two types of piano: those of pader and those of cola and half tail. Paders can be microphoned above when open or by placing a microphone inside and towards the back. The sound should not be very wide, because you already have a mental image regarding the size of the instrument. A cardioid microphone may be the best choice, because it could centralize the sound and thus reduce the other ambient sounds.
Grand and half-grand pianos are used in almost all musical pieces. The first and simplest method of recording pianos would be to use a single microphone positioned in the middle of the strings, in a paral. The microphone should be six to twelve inches above the strings (see fig. 11). This will almost always give a good balance between high and low frequencies. Cardiode microphones are excellent for these types of applications. If you can find a cardioid two-way microphone it would be a very good choice, as it has a high response to the harmonics of the strings.
Another technique is that of the three microphones, one cardioid and two omnidirectional, with parales. The first should be put near the piano to capture the highs and drop times. It should not be put too close so as not to favor any specific rope. The other two microphones should be placed on top of the piano to capture the ambient sound. They must be two meters high and one meter apart from each other (see fig.12). The exact position will depend on the acoustics of the room. The larger, the more distance there must be.


Leave your comment